[av_one_full first min_height=” vertical_alignment=” space=” custom_margin=” margin=’0px’ padding=’0px’ border=” border_color=” radius=’0px’ background_color=” src=” background_position=’top left’ background_repeat=’no-repeat’]
[av_textblock size=” font_color=” color=”]
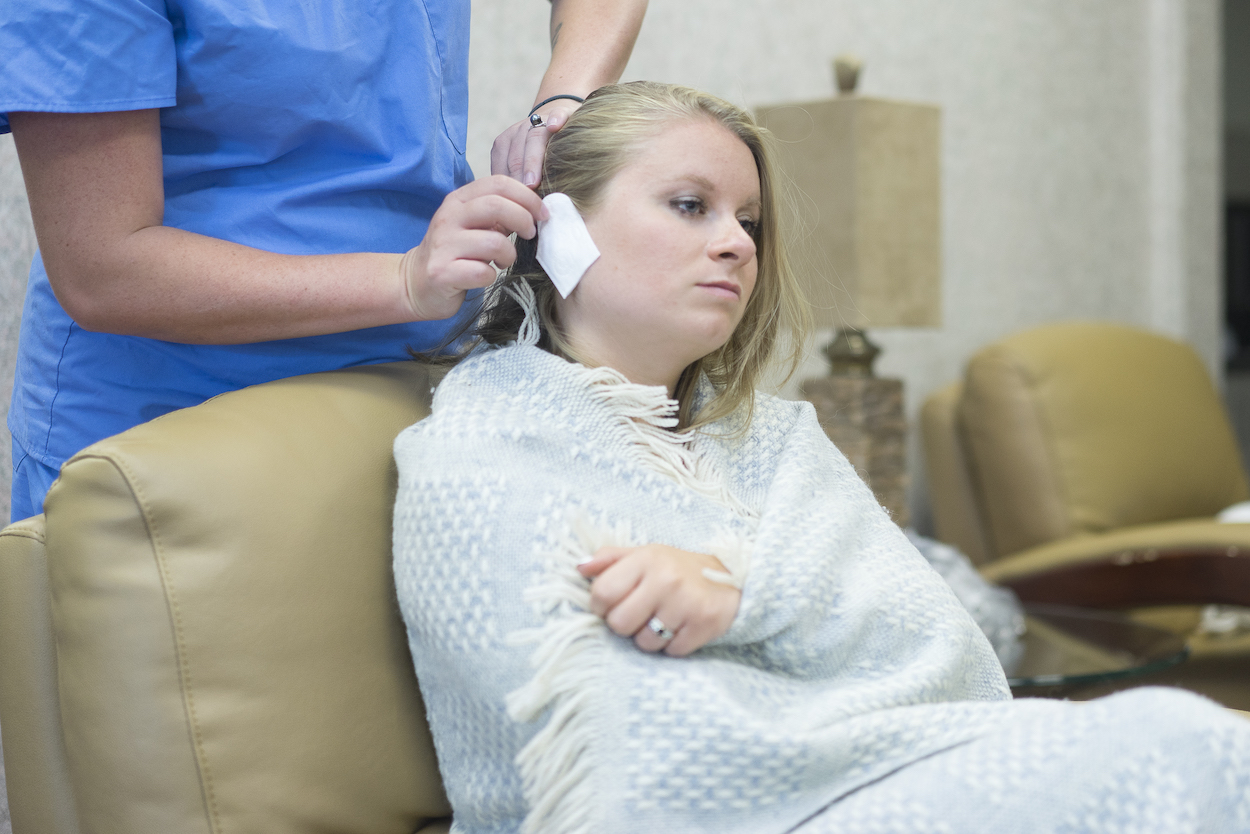
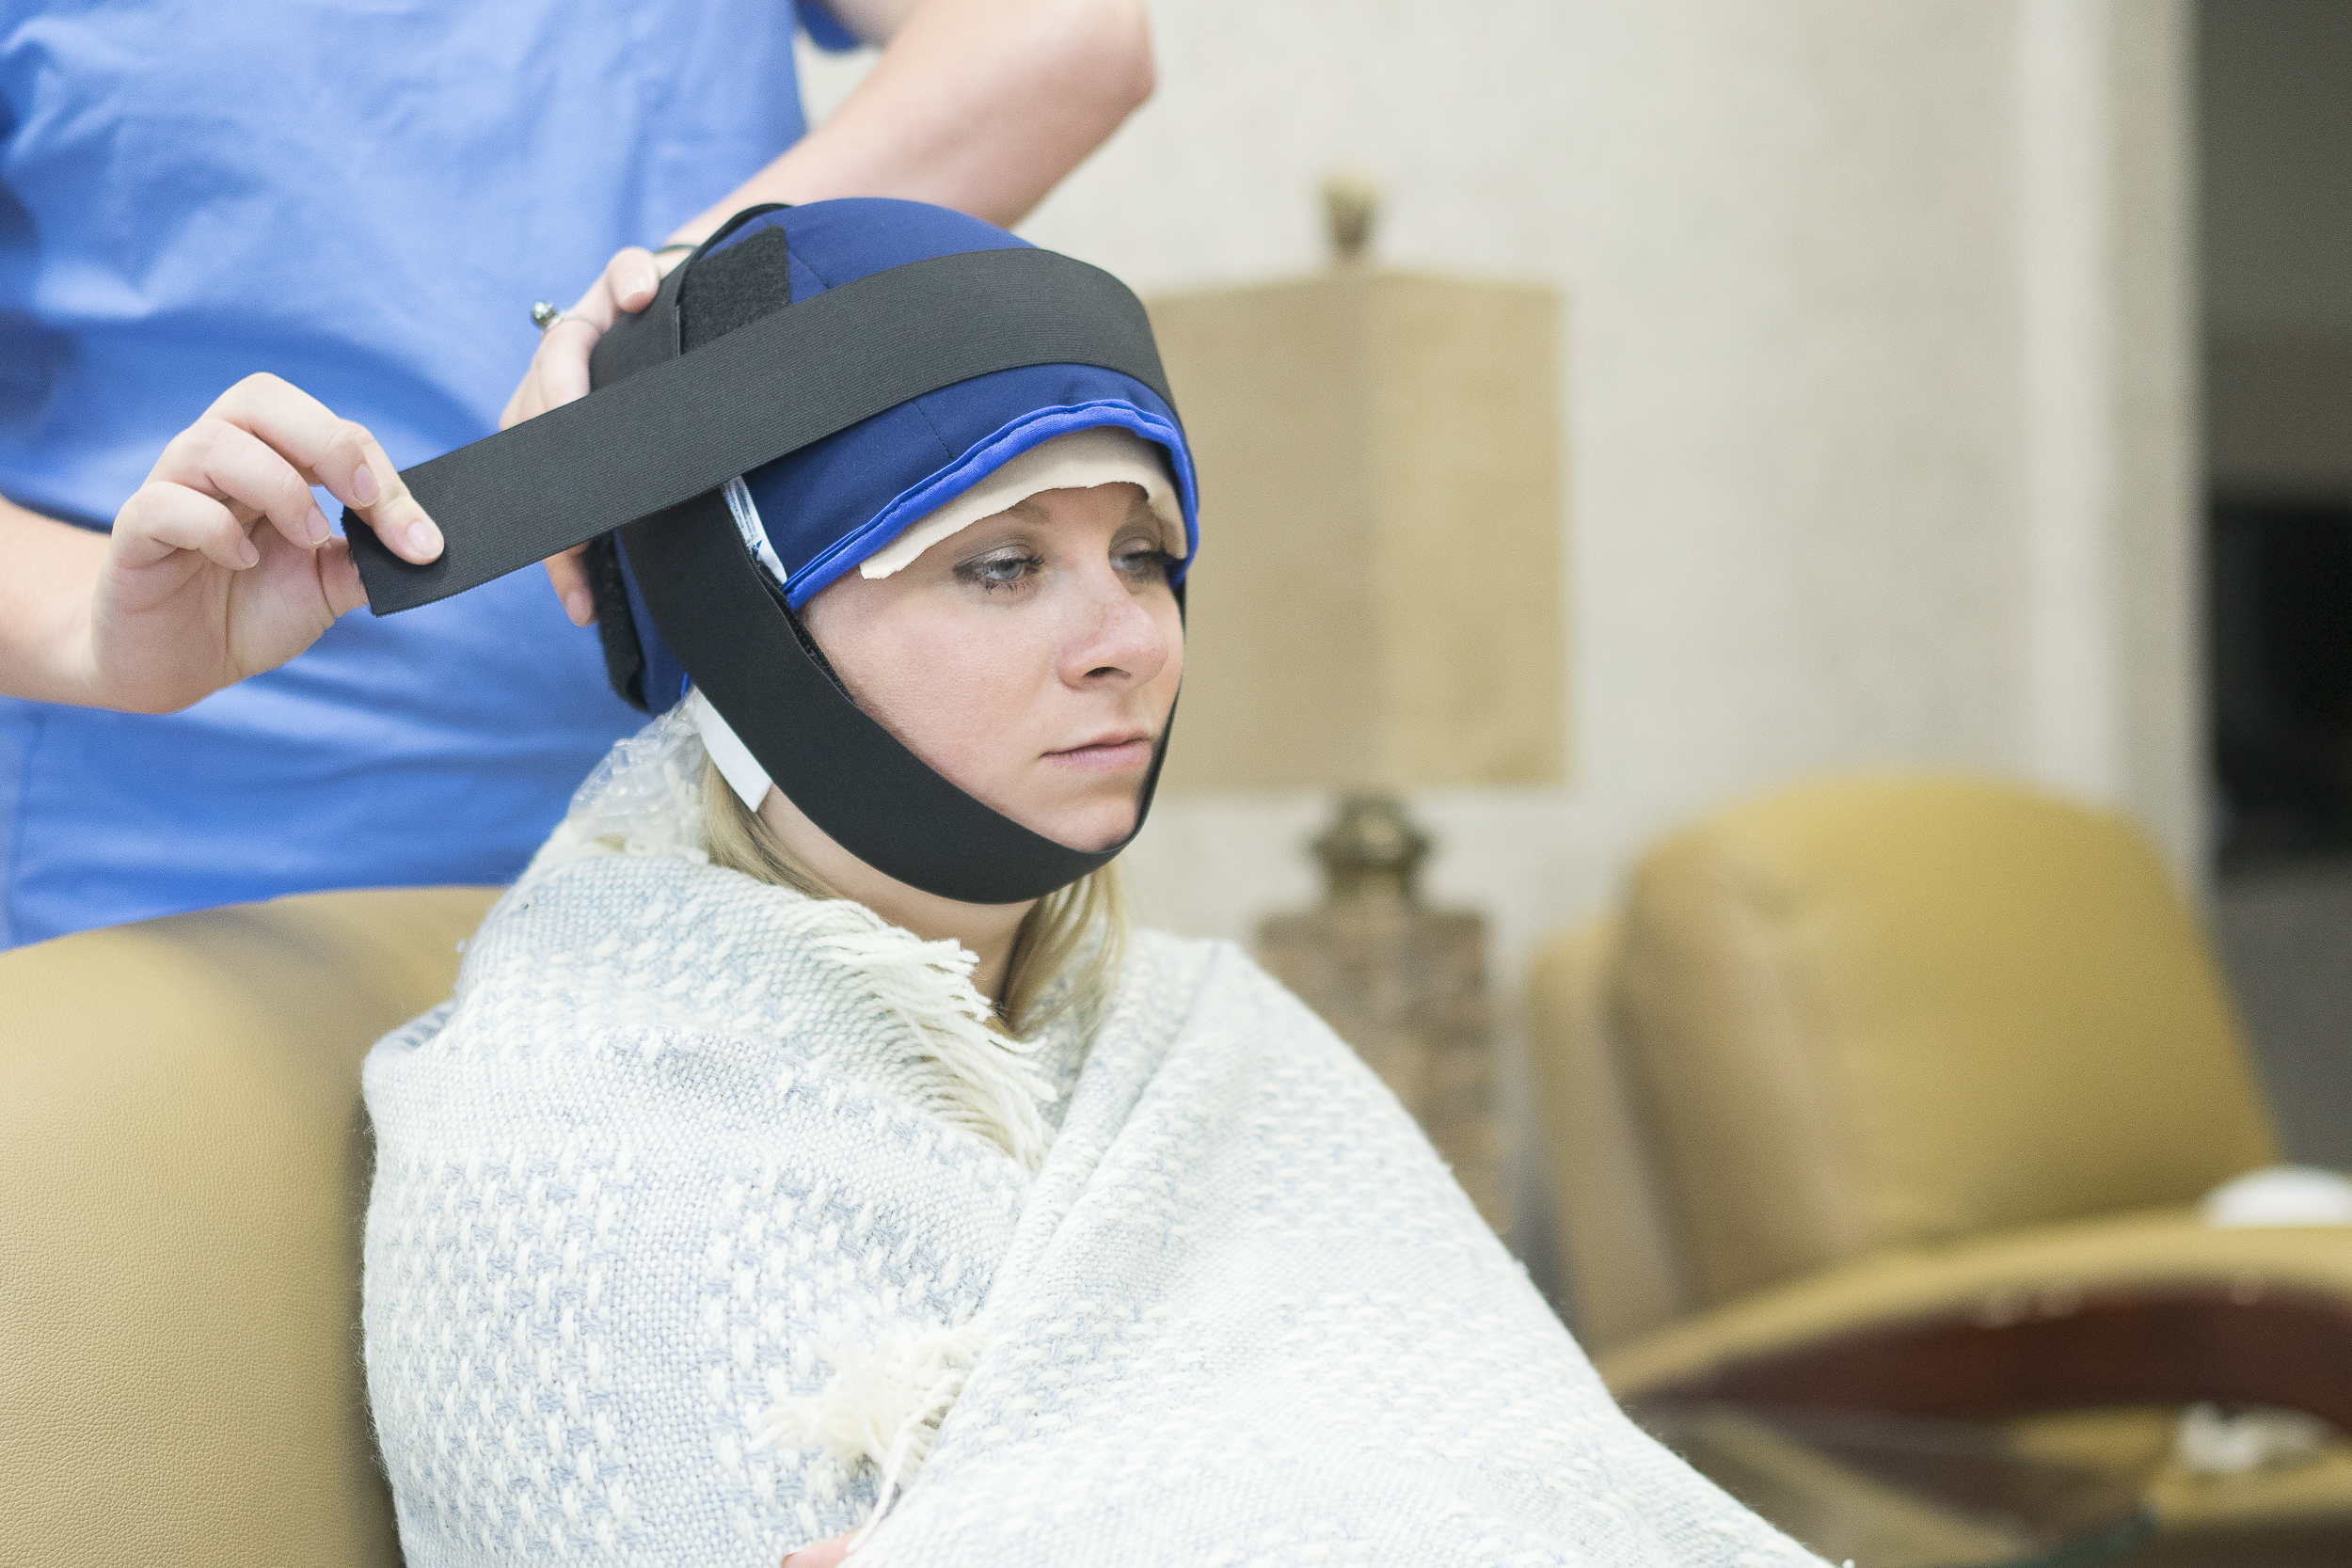
The Arctic Cold Cap system uses super cooled caps to constrict blood vessels in your scalp, thereby protecting your hair follicles from hair loss. The images below illustrate the Arctic Cold Cap process.
[/av_textblock]
[av_textblock size=” font_color=” color=”]
[/av_textblock]
[av_textblock size=” font_color=” color=”]
Step 1: Apply protective padding to ears and forehead. Comb hair flat and part hair. In subsequent cap changes change part.
[/av_textblock]
[av_hr class=’default’ height=’50’ shadow=’no-shadow’ position=’center’ custom_border=’av-border-thin’ custom_width=’50px’ custom_border_color=” custom_margin_top=’30px’ custom_margin_bottom=’30px’ icon_select=’yes’ custom_icon_color=” icon=’ue808′ font=’entypo-fontello’]
[av_textblock size=” font_color=” color=”]
[/av_textblock]
[av_textblock size=” font_color=” color=”]
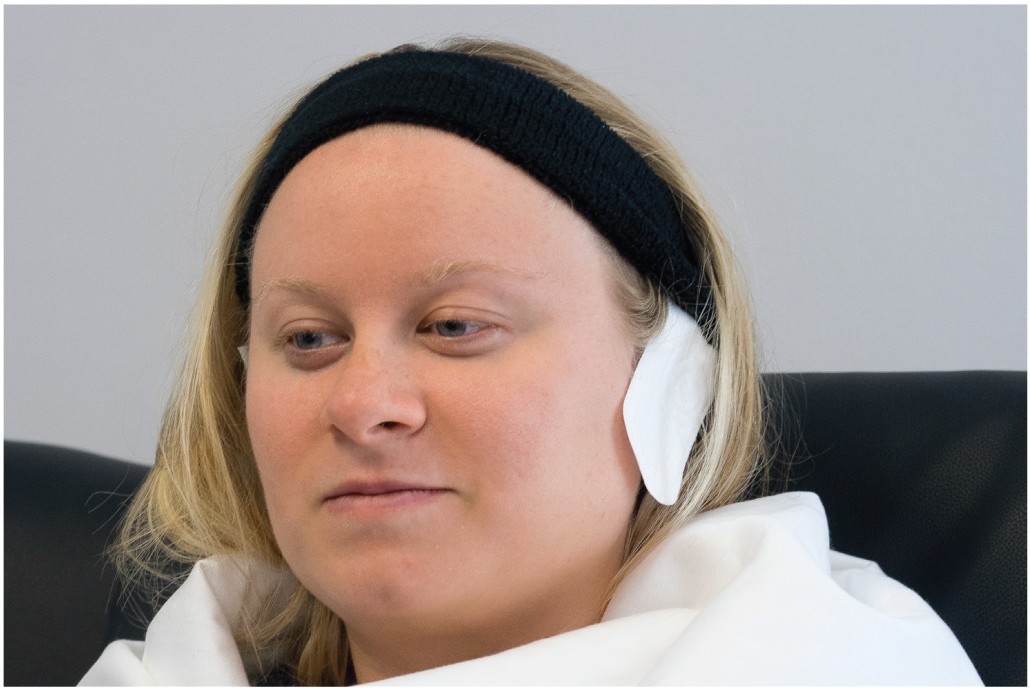
2. Apply protective moleskin and then remove the head band.
[/av_textblock]
[av_hr class=’default’ height=’50’ shadow=’no-shadow’ position=’center’ custom_border=’av-border-thin’ custom_width=’50px’ custom_border_color=” custom_margin_top=’30px’ custom_margin_bottom=’30px’ icon_select=’yes’ custom_icon_color=” icon=’ue808′ font=’entypo-fontello’]
[av_textblock size=” font_color=” color=”]
[/av_textblock]
[av_textblock size=” font_color=” color=”]
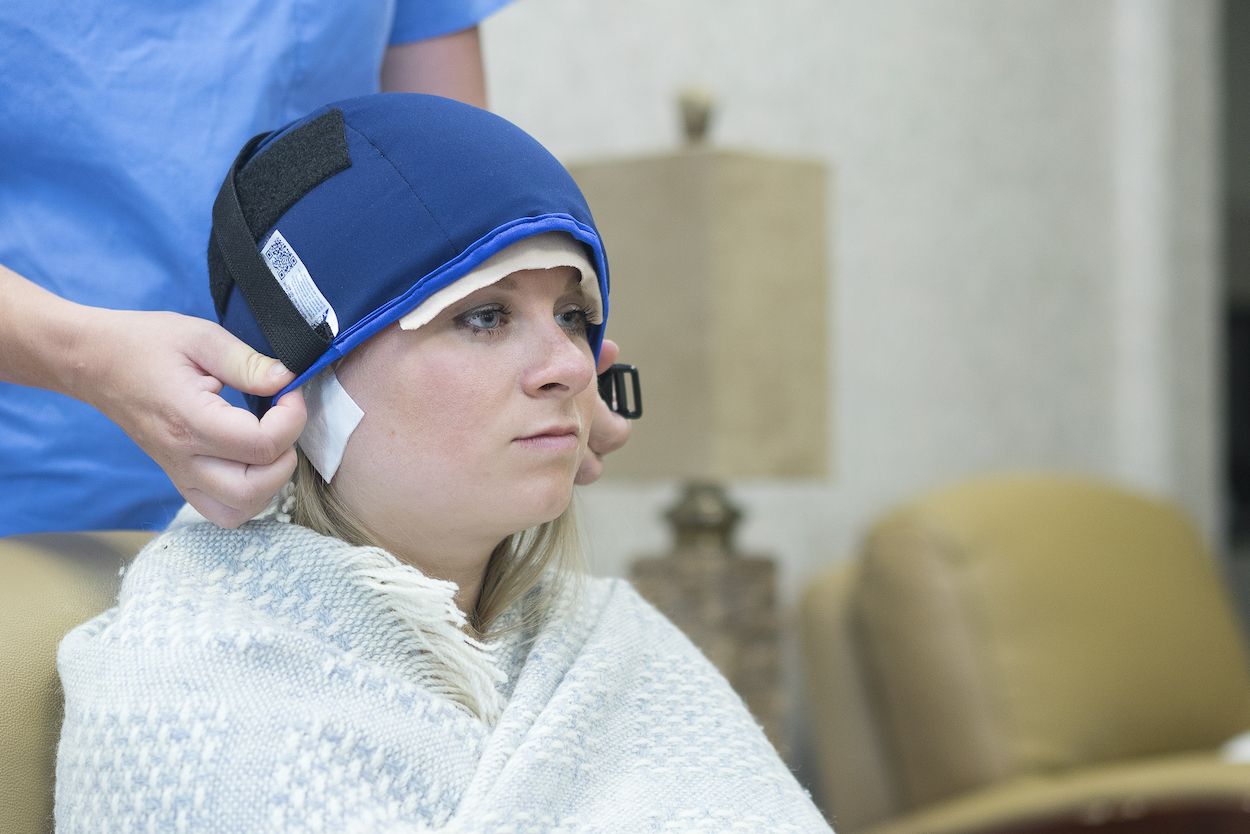
Step 3: Tightly secure cap, ensuring it is making contact with the entire scalp. It helps if the patient pulls down to increase tension, thereby ensuring full contact with scalp.
[/av_textblock]
[av_textblock size=” font_color=” color=”]
[/av_textblock]
[av_hr class=’default’ height=’50’ shadow=’no-shadow’ position=’center’ custom_border=’av-border-thin’ custom_width=’50px’ custom_border_color=” custom_margin_top=’30px’ custom_margin_bottom=’30px’ icon_select=’yes’ custom_icon_color=” icon=’ue808′ font=’entypo-fontello’]
[av_textblock size=” font_color=” color=”]
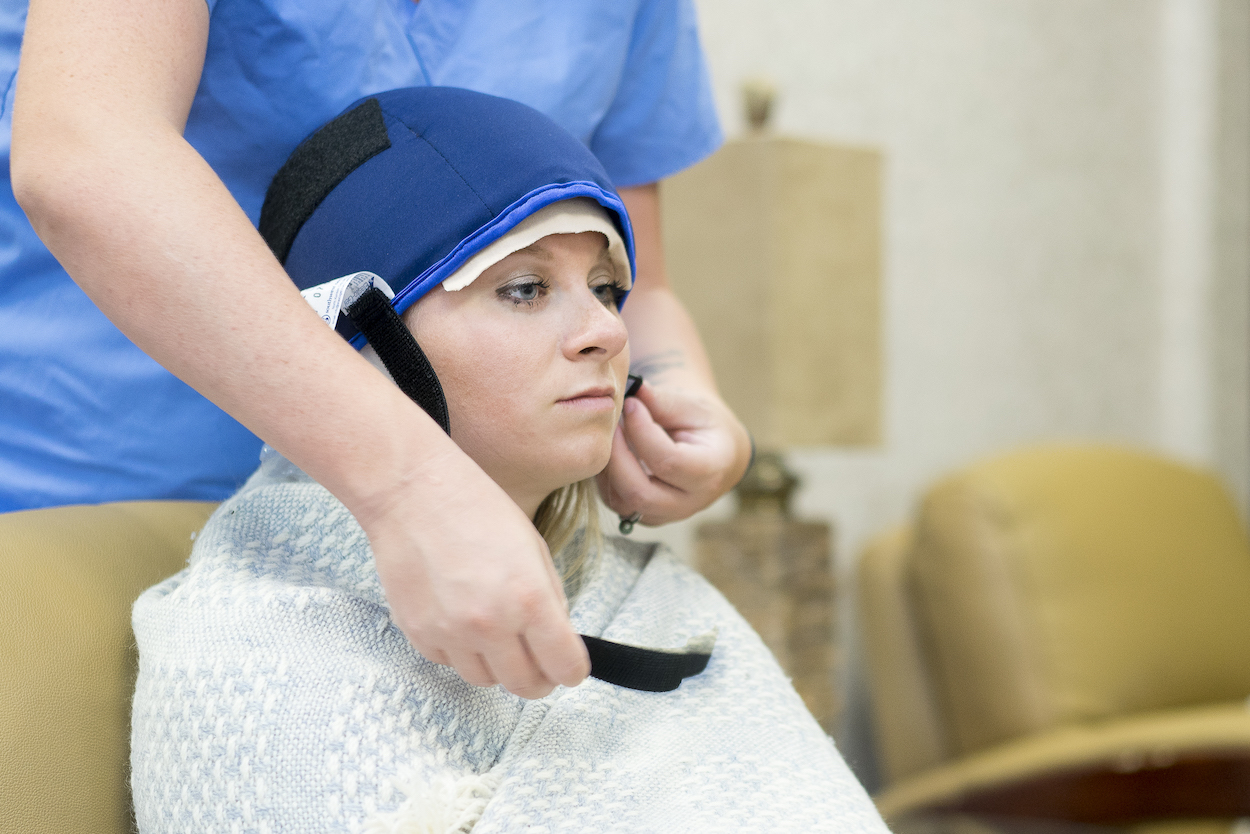
Step 4: Wrap Velcro straps around scalp and chin so the cap remains firmly in place.
[/av_textblock]
[av_hr class=’default’ height=’50’ shadow=’no-shadow’ position=’center’ custom_border=’av-border-thin’ custom_width=’50px’ custom_border_color=” custom_margin_top=’30px’ custom_margin_bottom=’30px’ icon_select=’yes’ custom_icon_color=” icon=’ue808′ font=’entypo-fontello’]
[av_textblock size=” font_color=” color=”]
[/av_textblock]
[av_textblock size=” font_color=” color=”]
Step 5. Wrap straps around the cap and chin to ensure good contact. Change first cap after 15 minutes. Then continue to change caps every 20 minutes. Remember always to start the treatment 45 minutes before the infusion; during the infusion and continue the cold cap therapy for at least 4 hours after the infusion comes to an end.
[/av_textblock]
[/av_one_full][av_one_full first min_height=” vertical_alignment=” space=” custom_margin=” margin=’0px’ padding=’0px’ border=” border_color=” radius=’0px’ background_color=” src=” background_position=’top left’ background_repeat=’no-repeat’]
[av_button_big label=’Saving Your Hair is Now a Real Option. Start Here. Call Today!’ description_pos=’below’ link=’page,271′ link_target=” icon_select=’yes-right-icon’ icon=’ue832′ font=’entypo-fontello’ custom_font=’#ffffff’ color=’custom’ custom_bg=’#956dbc’ color_hover=’theme-color’ custom_bg_hover=’#444444′][/av_button_big]
[/av_one_full]